Feb 24, 2012.. Find reviews, trailers, release dates, news, screenshots, walkthroughs, and more for Hidden Mysteries: Forbidden City here on GameSpot.
Get Hidden Mysteries: The Forbidden City, a Hidden Object game produced by Gunnar Games. Welcome to the wonderful and thrilling world of ancient China!
In Hidden Mysteries: The Forbidden City take on the role of Evelyn Tao, a bright young professor, who is in town grieving over the death of her father.
Sep 9, 2011.. Complete Hidden Mysteries: The Forbidden City Walkthrough & Strategy Guide. Overview of full game with annotated screenshots from actual ..
Download Hidden Mysteries: The Forbidden City on the free gaming site Qgames.org.
Download Hidden Mysteries: The Forbidden City! Uncover the Forbidden City! See screen shots and find related games. Read what others are saying about Hidden...
Sep 10, 2011.. Check out the walkthrough for Hidden Mysteries: The Forbidden City on our blog! To get to our Blog, click on the Big Fish Games logo at the top ..

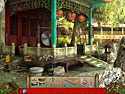
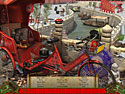
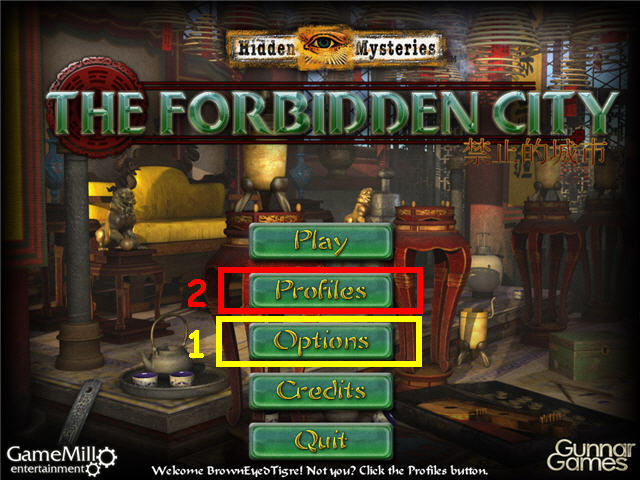
Welcome to the Hidden Mysteries: The Forbidden City Walkthrough! Uncover the Hidden Mysteries of the Forbidden City! Whether you use this document as a reference when things get difficult or as a road map to get you from beginning to end, we’re pretty sure you’ll find what you’re looking for here. This document contains a complete Hidden Mysteries: The Forbidden City game walkthrough featuring annotated screenshots from actual gameplay! We hope you find this information useful as you play your way through the game. Use the walkthrough menu below to quickly jump to whatever stage of the game you need help with. Remember to visit the Big Fish Games Forums if you find you need more help. Have fun! This walkthrough was created by BrownEyedTigre, and is protected under US Copyright laws. Any unauthorized use, including re-publication in whole or in part, without permission, is strictly prohibited. Chapter 2 – Forbidden City Head right. Find the fragments and get a DRUM, CHAIR ARM, TABLE and STONE BELL. Place the DRUM on the stand (L). Head right. Take the FISHING NET (M). Find the fragments and get a STONE WALL, DRAGON, PAPER LANTERN and CHINESE SYMBOL. Hang the STONE BELL from the rafters (N). Place the DRAGON on the pedestal (O). Back out two times and head forward. Find the fragments and get a VASE, FLAG, WICKER BASKET and SPOTLIGHT. Place the CHINESE SYMBOL on the sign (P). Place the FLAG on the pole (Q). Place the CHAIR ARM on the seat (R). Back out and head left. Find the fragments and get a KITE, FAROL, SHRUB, and SCROLL. Place the TABLE on the porch (S). Place the SCROLL on the right column (T). Hang the PAPER LANTERN from the eaves (U). Place the WICKER BASKET on the rocks (V). Use the FISHING NET on the water (W) to get a KEY. The net will pulsate when over the correct spot. Back out, head right two times. Place the FAROL on the mount (X). Place the VASE on the rail (Y). Back out. Place the SPOTLIGHT by the bushes (Z). Place the STONE WALL by the wall (A). Place the SHRUB on the left (B). Back out and head forward. Place the KITE on the left (C). Use the KEY on the lock (D). Examine the stand to access a Hidden Object Scene. Find the items listed and get DOOR RIVETS. Place the DOOR RIVETS on the door to the right of the stand to trigger a puzzle. The goal is to get all buttons pushed in. One button pushes in three others. See screenshot for groupings. Push in any button in the group of 4 in the screenshot. You need to push 6 buttons to complete the puzzle. See screenshot for my solution, yours may be different. Chapter 3 – Doctor Fang Head right. Find the fragments and get a LARGE BRUSH, LION HEAD, WALL CANVAS and ARMOR. Take the HAMMER (E). Place the LION HEAD on the lion (F). Examine the litter (G) to access a Hidden Object Scene. Find the items listed and get a BOWL. Head straight into the building. Find the fragments and get WRITINGS, FLARES, INCENSE BURNER and MIRROR PIECE. Place the MIRROR PIECE on the mirror (H). Place the ARMOR on the stand (I). Back out two times, head straight. Find the fragments and get PILLOWS, URN, BRUSHES, and PAPER LANTERN. Place the brushes on the rack (J). Use the HAMMER on the vase (K) and take the KEY. Place the LARGE BRUSH on the rack (L). Place the WRITINGS on the wall (M) to trigger a puzzle. Rotate the rings to place all symbols that require one brush stroke around the first circle, the symbols that require two brush strokes around the second, and three brush strokes around the right circle. The starting layout is random, see screenshot (N) for one solution. Note the saying ‘The Lion is Thirsty’ when complete. Back out and head left. Find the fragments and get a STONE PILLAR, THRONE, HANGING LANTERN, and a GUAN DAO. Place the PILLOWS in the alcove (O). Place the HANGING LANTERN by the chimes (P). Place the INCENSE BURNER by the sink (Q). Place the WALL CANVAS in the frame (R). Back out, head right and enter the building. Place the URN on the stand (S). Place the GUAN DAO on the rack (T). Use the KEY on the box; take the FAUCET HANDLE (U). Back out two times and head left. Place the FAUCET HANDLE on the spigot (V). Use the BOWL on the water to get a BOWL OF WATER. Back out and head right. Use the BOWL OF WATER on the lions face; take the SCRIPTURE TABLET (W). Place the STONE PILLAR on the wall (X). Hang the PAPER LANTERN on the doorway (Y). Place the FLARES in the stand (Z). Enter the building. Place the SCRIPTURE TABLET under the mirror (A). Back out two times then head straight. Find the fragments and get STAR CHART, TORCH LAMP, URN and SCULPTURE. Place the SCULPTURE on the pedestal (J). Place the BOOKS on the bookshelf (K). Back out. Place the TORCH LAMP on the pedestal (L). Use the CANDLE LIGHTER on the flames (M) to get a LIT CANDLE LIGHTER. Use the LIT CANDLE LIGHTER on the TORCH LAMP (N). Use the ROPE on the fallen statue (O). Head down into the passage (P). Find the fragments and get a SCROLL, CANDLES, STATUE HEAD and partial painting. Place the COFFIN PLAQUE on the coffin (Q). Place the CANDLES on the holders (R). Place the URN on the shelf (S). Back out. Place the STATUE HEAD on the left statue (T). Enter in the passage (U). Find the fragments and get a GLOBE, SUN, ROBE and SKELETON. Take the PICTURE FRAME (V). Place the SUN in the center (W). Back out and head right. Place the GLOBE on the axis (X). Click on the GLOBE to open; take the final piece of SATURN (Y). Hang the SCROLL on the hanger (Z). Place the STAR CHART in the frame (A). Back out and head straight down. Place the SKELETON in the coffin (B). Click on the coffin twice to return it to the vault. Take the final piece of the PAINTING (C). Back out and head left. Place the ROBE on the form (D). Place the PICTURE FRAME on the wall (E). Place the PAINTING in the PICTURE FRAME. Back out and head straight between the statues. Place the SATURN on the spindle (F) to trigger a puzzle. Align all the planets to the black holes on the opposite side. Each of the 4 buttons turns 3 planets. Click on the center to reset the puzzle. Solution: Click the following buttons in this order; 1-2-3-4×2-1-2-3-4×2-2-1×2-2×3-1×8. Congratulations! You have successfully completed Hidden Mysteries: The Forbidden City.
Hidden Mysteries: Forbidden City Screenshots. 11 screenshots for Hidden Mysteries: Forbidden City. Ask.com and get. Game Talk. Top 10 Ghosts in Video ..
Hidden Mysteries: The Forbidden City for iPad, iPhone, Android, Mac & PC! Uncover the Hidden Mysteries in the Forbidden City!!